Expand Your Veggie Recipes
Last week I talked about the importance of eating vegetables.
Remember, vegetables provide essential phytonutrients that give your body the building blocks it needs to fend off potential diseases. That alone is reason enough for me to up my intake. I’d rather use food as medicine now and fill up on vitamins and phytonutrients in the form of veggies than be forced to take medicine down the line.
Now that you have a better idea about why eating a variety of vegetables is essential to your health and vitality, maybe you’re feeling more inclined to venture out and try new foods! There are lots of veggie recipes you can include in your diet.
This week I decided to focus on vegetables that are in season now. I highly recommend purchasing locally grown produce that is naturally in season. The main reason is because seasonal food is fresher and tends to be tastier and more nutritious.
If that doesn’t convince you, here are three more reasons to by local and in season:
– to reduce the energy (and associated CO2 emissions) needed to grow and transport the food we eat
– to avoid paying a premium for food that is scarcer or has travelled a long way
– to support the local economy
Most grocery stores clearly label locally grown produce.
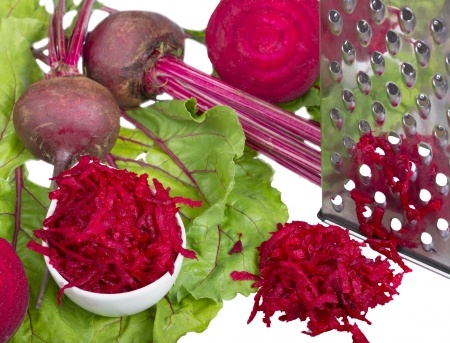
Let’s begin with beets. Why are beets good for you?
Beets come in a variety of colors (purple, red, pink, yellow), each providing different phytonutrients. Beet root as well as its top-greens (yes, you CAN eat beet greens!) contain a variety of pigment-associated antioxidants that have been found to offer protection against coronary artery disease and stroke, lower cholesterol levels within the body, and have anti-aging effects.
Beets are rich in the phytonutrient Betaine, which provides protective effects against cardiovascular disease. When eaten raw, they are an excellent source of folate, which is extremely beneficial for fetal development in pregnant women.
Here’s a recipe for the veggie lover courtesy of Martha Rose Shulman, author of The Very Best of Recipes for Health.
Simmered Beet Greens With Roasted Beets, Lemon and Yogurt
- 2 bunches of beets with greens
- 2 tablespoons extra virgin olive oil
- Salt and freshly ground pepper
- Juice of 1 lemon (more or less to taste)
- 1 to 2 garlic cloves (optional)
- 1 cup drained yogurt
- 3 tablespoons chopped walnuts (optional)
- Preheat the oven to 425 degrees. Cut the greens away from the beets, leaving about 1/4 inch of stems. Scrub the beets and place in a baking dish or lidded ovenproof casserole. Add 1/4 inch water to the dish. Cover tightly. Place in the oven and roast small beets (3 ounces or less) for 30 to 40 minutes, medium beets (4 to 6 ounces) 40 to 45 minutes, and large beets (8 ounces) 50 to 60 minutes, until easily penetrated with the tip of a knife. Remove from the oven and allow to cool in the covered baking dish. Cut away the ends and slip off the skins. Slice or cut in wedges and set aside.
- While the beets are in the oven, stem the greens and wash in at least 2 changes of water. Place in a bowl.
- Heat a large, wide skillet over high heat and add the greens by the handful, stirring each handful until the greens wilt in the water left on the leaves after washing. Once one batch has wilted, add another until all of the greens are wilted. Add 1 tablespoon of the olive oil, turn the heat down to low, season with salt and pepper, cover and simmer for 5 minutes. The greens should be tender but still bright. Add 1 tablespoon lemon juice, toss the greens in the pan, taste and adjust seasoning. (Note: if you are not serving this right away, don’t add the lemon juice, as it will change the bright color of the greens; instead, add shortly before serving).
- At this point you have the option of transferring the greens to a platter or serving the dish right from the pan. Whether in the pan or on a platter, arrange the beets on top of the greens. Drizzle on the remaining olive oil and squeeze on more lemon juice to taste. Mash the garlic to a purée with a pinch of salt in a mortar and pestle and stir into the yogurt. Place spoonfuls of yogurt over the top of the beets and beet greens, sprinkle on the walnuts and serve, with grains if desired.
Yield: 4 servings.
Advance preparation: The roasted beets will keep for 4 to 5 days in the refrigerator, as will the wilted greens.
And here’s one for the veggie haters. Thanks to Diana Keuilian, even the pickiest eaters can enjoy the benefits of beets in a tasty disguise! This just happens to be gluten and dairy free too!
Luscious Beet Brownie Recipe
Ingredients:
- 5 oz dark chocolate, 72% or higher cocoa content
- ¼ cup coconut oil
- ⅓ cup raw honey
- 2 omega-3, free range eggs
- 2 teaspoons vanilla extract
- ¼ teaspoon almond extract
- 1 cup blanched almond flour
- 2 Tablespoons coconut flour
- ¼ cup unsweetened cocoa powder
- 1½ teaspoons baking soda
- ¼ teaspoon salt
- 2 cooked beets, pureed (to save time use organic, canned beets)
Instructions:
- Preheat oven to 350 degrees F. Grease an 8×8 pan with coconut oil, then dust with blanched almond flour. Set aside.
- In a double boiler, gently melt the chocolate. (If you don’t have a double boiler then fill a skillet with a few inches of water and set a small pot in the water, place over very low heat.) Add the coconut oil and raw honey. Mix until fully combined. Remove from heat and set aside to cool.
- In small bowl combine the eggs, vanilla and almond extracts. Add the cooled chocolate mixture.
- In a medium bowl combine almond flour, coconut flour, cocoa powder, baking soda and salt. Pour in the wet ingredients and mix until fully combined. Mix in the pureed beets.
- Pour batter into prepared pan and bake for 25 minutes, or until fully set. Cool in the pan for at least 30 minutes before cutting. *Tip: Use a serrated, plastic knife to cut your brownies — this makes it less likely to crumble.
Now let’s talk about cauliflower.
Yes, I purposely chose vegetables that most people avoid. I want to help you branch out! Detoxing seems to be the latest trend right now but did you know that certain foods naturally assist your body’s detoxification process?
Cauliflower and other cruciferous veggies (Brussels sprouts, kale, broccoli, etc.) are essential for liver detox. The detox support provided by cauliflower includes antioxidant nutrients to boost Phase 1 detoxification activities and sulfur-containing nutrients to boost Phase 2 activities. Cauliflower also contains phytonutrients called glucosinolates that can help activate detoxification enzymes and regulate their activity.
Additionally, Cauliflower is an excellent source of vitamin C, vitamin K (which yields powerful anti-inflammatory benefits), folate, B Vitamins and magnesium.
If you’re new to eating cauliflower try these veggie recipes; you might prefer it somewhat masked in a soup.
Try this Curried Cauliflower Soup adapted from Martha Rose Shulman on the New York Times Cooking Blog.
Curried Cauliflower Soup
INGREDIENTS:
- 1 tablespoon olive or coconut oil
- 1 onion, chopped
- 2 garlic cloves, chopped
- 2 teaspoons finely chopped ginger
- 2 teaspoons curry powder
- 2 teaspoons cumin seeds, ground
- 2 pounds cauliflower (1 medium head), roughly chopped
- 1 russet potato, peeled and diced, (sweet potato works well too)
- 1 quart vegetable stock or chicken stock
- 1 quart light coconut milk or almond milk
- Salt to taste
- Freshly ground pepper
- Chopped cilantro for garnish
PREPARATION
- Heat the oil over medium heat in a large, heavy soup pot and add the onion. Cook, stirring often, until onion is tender, about 5 minutes. Add the garlic, ginger, curry powder and ground cumin and cook, stirring, until fragrant, 30 seconds to a minute. Add the cauliflower, potato , stock, almond milk, and salt to taste and bring to a boil. Reduce the heat, cover and simmer 30 minutes.
- Using an immersion blender, purée the soup (or you can use a regular blender, working in batches and placing a kitchen towel over the top to avoid splashing) until it is very smooth. Return to the pot, heat through, add freshly ground pepper and adjust salt. Serve, garnishing each bowl with chopped cilantro.
Tip
- Advance preparation: You can make this a day ahead, but you may have to thin it out with a little water or stock when you reheat.
This cauliflower recipe is sure to be a crowd pleaser. Here’s a healthy twist to traditional fried rice:
Cauliflower “Fried Rice”
Skinnytaste.com
Servings: 4 • Size: heaping 1 1/3 cups
- 1 medium head (about 24 oz) cauliflower, rinsed
- 1 tbsp sesame oil
- 2 egg whites
- 1 large egg
- pinch of salt
- cooking spray
- 1/2 small onion, diced fine
- 1/2 cup frozen peas and carrots
- 2 garlic cloves, minced
- 5 scallions, diced, whites and greens separated
- 3 tbsp soy sauce, or more to taste (Tamari for Gluten Free)
Directions:
Remove the core and let the cauliflower dry completely. Coarsely chop into florets, then place half of the cauliflower in a food processor and pulse until the cauliflower is small and has the texture of rice or couscous – don’t over process or it will get mushy. Set aside and repeat with the remaining cauliflower.
Hopefully, these veggie recipes will inspire you to try new things.
Now you see that eating vegetables doesn’t limit you to steamed broccoli or spinach salads. Try these veggie recipes! Jazz up vegetables with seasonings and add them to other foods to enhance the nutrient profile. Getting those phytonutrients is much easier…and tastier than you thought! Enjoy!
Resources:
1.http://www.whfoods.com/genpage.php?tname=foodspice&dbid=13
2. http://cooking.nytimes.com/recipes/12178-curried-cauliflower-soup
4. http://www.eattheseasons.com/why.php
5. http://www.skinnytaste.com/2014/03/cauliflower-fried-rice.html


